This weeks Flickr inspiration: Breakfast
1. Isabelle Bertolini
2. Stephanie Gonot
3. Paul Jackson
4. The 1o cent designer
My favorite breakfast is toast, a farm fresh poached egg, bacon, and coffee. Do you have a favorite breakfast? It is the most important meal of the day!
p.s. I have an awesome photoshop tutorial for tomorrow that I'm really excited to share. It took me forever, but its' worth it.
p.p.s. I also tried to make this blog look more like fall, which is weird after having endured a temp has been in the 100s this week. I am looking forward to cool weather.
Friday, September 30, 2011
Thursday, September 29, 2011
5 of my Favorite Photographs
I'm a little sick and busy this week. I just signed up for a special projects class for photography that I'm really excited about, I still have a sore throat, I'm hopefully and finally getting a job thanks to a friend of a friend, and I'm going to be making a ton of jewelry to get ahead on Christmas presents.
Because of this business, I don't have many new photographs to post. Instead, today I thought I would share with you some of my most favorite photographs and what they mean to me.
Because of this business, I don't have many new photographs to post. Instead, today I thought I would share with you some of my most favorite photographs and what they mean to me.
1.

2.

Devin has been my very good friend for a long time, and I think this is the most Devin photo I have ever taken of him. He and a friend built a raft during winter and tested it on a very cold day. This is also the first photo that I ever had published in a magazine (The Red Wheelbarrow at UCSC). I like to look at this when I miss my best friend.
2.
Ok, I know that I share this photo a lot, but you must understand how exciting it is for me. This was the first night/long exposure photo I took that actually came out as I imagined it and saw it. It is really, really difficult to take a night photo as your eyes see it, so this success made me giddy for months.
3.

There are some photos that only mean much to the photographer because of the moment, the place, and the memories. This is one of those photos. I can't even begin to scratch the surface of what this photo means to me. All I can share is that this is in Uvas, and that rocks is called "the god rock" and I have been there many, many times.
4.

A lot of my work and projects deal with bodies and nature. In fact, the next big black and white project I am working on deals with just that. I'm really into making bodes look rather disconnected and taking photos of things that are abstract. One of my friends commented on this theme of mine and called it "raw", which is where Let It Be Raw comes from.
5.

This print looks much better in my hands, as it is less grey and looks more like an actual black and white print. Scanners do strange things to photos. I think of this photo as one of the best photos I have ever taken in black and white and possibly ever. Every detail is present and the contrast is perfect. Also, this is my dad, so it means a lot to me. We both have scars like that.
Wednesday, September 28, 2011
Book Review #11
This post is related to Mythical Mondays by Dewi (All of the Animals). I really like that she shares mythical stories every Monday because I am a huge fan of mythology and folklore. She asked for a recommendation by Joseph Campbell, so that is why this book review is about The Hero with a Thousand Faces.
Before I begin, be aware that this book was written in the 40s, so it is not exactly politically correct (ie use of the term primitive and such that is frowned upon now and the absence of some world mythology). Given that, there is still a lot of great stuff in this book as well as a large collection of stories from around the world. This book presents the idea that there is a pattern in mythologies from around the world that are based around a hero's journey. Campbell even makes a map the shows the flow of the hero's journey which is basically something like this:
Before I begin, be aware that this book was written in the 40s, so it is not exactly politically correct (ie use of the term primitive and such that is frowned upon now and the absence of some world mythology). Given that, there is still a lot of great stuff in this book as well as a large collection of stories from around the world. This book presents the idea that there is a pattern in mythologies from around the world that are based around a hero's journey. Campbell even makes a map the shows the flow of the hero's journey which is basically something like this:
One of the more famous uses of the hero's journey is Luke Skywalker in Star Wars, but it is a formula you can apply to pretty much any hero in an adventure or mythological story. Campbell is really into finding patterns from mythologies around the world and writes about mythologies throughout the ages and their connections in The Masks of God. It is a set of 4 books, and I've made it through 2. It can get kind of dry sometimes, and I don't always agree with the idea that every culture's mythology can be thrown in a basket of connections, but it is a great body of work and has a lot of information if you're interested.
So there you have it. You can write your own story using the hero's adventure formula, apply it to real life stories, disagree with it, or do what you wish with it. Can you apply it to photography? I think so. I did a short photographic story on a hero's descent into evil, which you can see here. I didn't exactly follow the hero's journey, but the idea is still there.
Saturday, September 24, 2011
Guest Post --- The Deadly Doodler
Hello Inquisitive Minds!
Today I am honored with the privilege of posting as a guest on my friend Kiley's blog! As you know, Kiley is an investigator. She likes to learn how things are done and how they work. So today I'm going to write about painting and the process thereof.
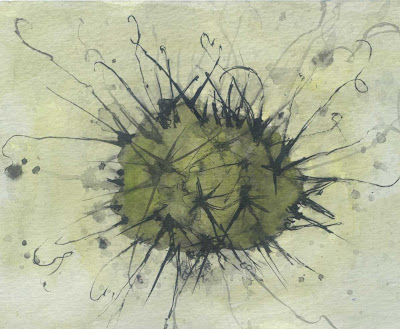
This week Kiley and I got together to pursue a common interest: painting and drawing. We decided to draw her cacti because she's got this gigantoid collection of different species she's found all over California. She even has ones that look like brains and butts!! Anyway, we set up a pot of cacti as models for our paintings and began to torture the paper, ink bled all over those pristine white surfaces and we came up with some fiendish-looking specimens. We used water-soluble graphite so our preliminary sketches would be washed away when we started painting. For the second layer I used coffee on Simba, and the rest is acrylic ink. We used one made by FW ink that's iridescent blue/white when it dries... it's so beautiful and I think it looks sensational with the red spot. :)
This one looks a bit like the Flying Spaghetti Monster, don't you think?
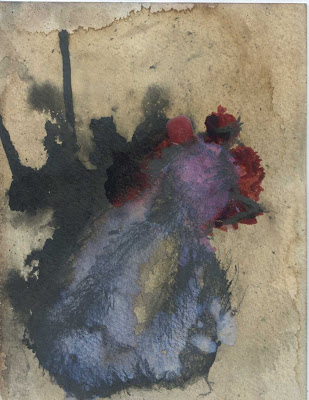
Then I tried drawing the baby toes, then the brains with no success. I decided on drawing her cat, Simba, who was sunning herself on a chair outside using water-soluble graphite. Unfortunately when I brushed over the surface with the water, the cat got washed out and looked like a cat-spot. So later I took it home and defined the spot with acrylic ink and more aquarellable pencil. I think it turned out nicely, even if it is a little morbid... In my defense we were talking about not eating cats because we couldn't finish the whole thing (I know that sounds terrible but that's just my sense of humor). We decided that Simba is too old and doesn't have enough meat on her bones. So she's set for the Zombie Apocalypse: she's off the menu. ;)
Simba through the eyes of a zombie.
In the end, painting is all about layering. First you draw out what you want your image to look like, then you add layers of color or gray. Then you step back to let it dry and go back to it. It's up to you: your art is only finished when you decide that it is :)
This has been TheDeadlyDoodler. Thanks for reading!
For more on what TheDeadlyDoodler is up to, visit her here and don't be shy, leave a comment!
Today I am honored with the privilege of posting as a guest on my friend Kiley's blog! As you know, Kiley is an investigator. She likes to learn how things are done and how they work. So today I'm going to write about painting and the process thereof.
This week Kiley and I got together to pursue a common interest: painting and drawing. We decided to draw her cacti because she's got this gigantoid collection of different species she's found all over California. She even has ones that look like brains and butts!! Anyway, we set up a pot of cacti as models for our paintings and began to torture the paper, ink bled all over those pristine white surfaces and we came up with some fiendish-looking specimens. We used water-soluble graphite so our preliminary sketches would be washed away when we started painting. For the second layer I used coffee on Simba, and the rest is acrylic ink. We used one made by FW ink that's iridescent blue/white when it dries... it's so beautiful and I think it looks sensational with the red spot. :)
This one looks a bit like the Flying Spaghetti Monster, don't you think?

Then I tried drawing the baby toes, then the brains with no success. I decided on drawing her cat, Simba, who was sunning herself on a chair outside using water-soluble graphite. Unfortunately when I brushed over the surface with the water, the cat got washed out and looked like a cat-spot. So later I took it home and defined the spot with acrylic ink and more aquarellable pencil. I think it turned out nicely, even if it is a little morbid... In my defense we were talking about not eating cats because we couldn't finish the whole thing (I know that sounds terrible but that's just my sense of humor). We decided that Simba is too old and doesn't have enough meat on her bones. So she's set for the Zombie Apocalypse: she's off the menu. ;)
Simba through the eyes of a zombie.

In the end, painting is all about layering. First you draw out what you want your image to look like, then you add layers of color or gray. Then you step back to let it dry and go back to it. It's up to you: your art is only finished when you decide that it is :)
This has been TheDeadlyDoodler. Thanks for reading!
For more on what TheDeadlyDoodler is up to, visit her here and don't be shy, leave a comment!
Friday, September 23, 2011
Guest Post --- Deer in a Bottle
Hi everyone! I'm happy to share with you an easy tutorial for making your product photographs beautiful! I use this for all my jewelry in my etsy shop.
First take a photo that obviously needs some retouching. I used my nikon with a lightbox set up for this photo, but it still could use a little work.
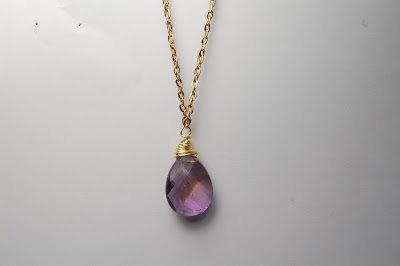
First take a photo that obviously needs some retouching. I used my nikon with a lightbox set up for this photo, but it still could use a little work.

Step 1: Create a new layer fill for Brightness/Contrast.
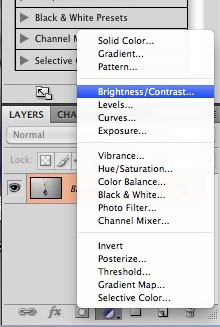
Step 2: Boost the brightness up until your photo is more vivid. Don't worry about getting it completely white yet.
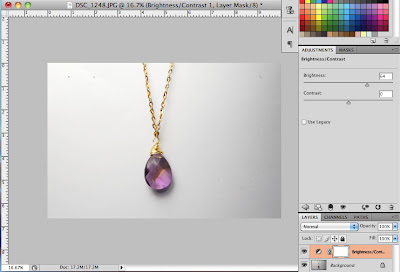
Step 3: Choose a dodge brush and select midtones.
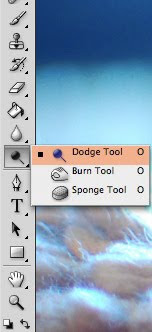
Step 4: Start brushing the background of your photo. The gray background soon becomes a lighter white.
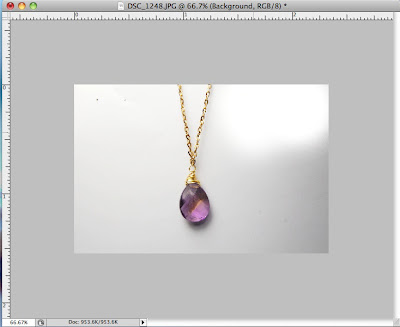
Step 5: Now select your burn brush to darken your product. For this necklace, dodge creates a deeper color.
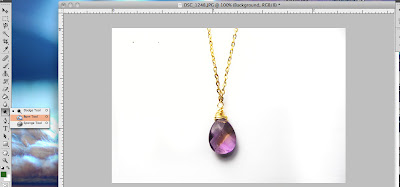
Here is your finished product!
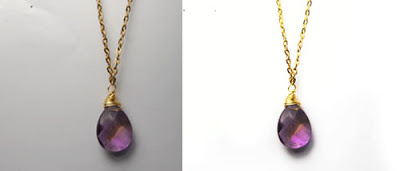
I hope you all enjoyed this tutorial! And I hope your product photos become beautiful and amazing!
Deer in a Bottle Blog
Deer in a Bottle Designs

Step 2: Boost the brightness up until your photo is more vivid. Don't worry about getting it completely white yet.

Step 3: Choose a dodge brush and select midtones.

Step 4: Start brushing the background of your photo. The gray background soon becomes a lighter white.

Step 5: Now select your burn brush to darken your product. For this necklace, dodge creates a deeper color.

Here is your finished product!

I hope you all enjoyed this tutorial! And I hope your product photos become beautiful and amazing!
Deer in a Bottle Blog
Deer in a Bottle Designs
Thursday, September 22, 2011
Guest Post --- Nadiine-X
Hi everyone! My name's Nadine and I am currently about to begin my last year as a fine art student. It's been so manic and everything has come and gone so quickly! There has been so many tough times and times where I have lost creativity and ambition. But there has been five sayings and pieces of artwork that have kept me going and inspired me - which I would love to share with you.
| Tuttomundo - Keith Haring |
"I don't think art is propaganda; it should be
something that liberates the soul, provokes the imagination and
encourages people to go further. It celebrates humanity instead of
manipulating it."
Keith Haring
encourages people to go further. It celebrates humanity instead of
manipulating it."
Keith Haring
| The Dutch Settlers Part 1 |
"I don't think about art when I'm working. I try to think about life."
Jean-Michel Basquait
| Galaxy |
"I have no fear of making changes, destroying the image, etc., because the painting has a life of its own"
Jackson Pollock
“Nothing in the world is more common than unsuccessful people with
talent, leave the house before you find something worth staying in for. ”
Banksy
I hope you enjoyed this post - sorry its a tad bit short but you can see more things that inspire me over at my blog - here. Thank-you Kiley for having me :)
Wednesday, September 21, 2011
Guest Post --- Blue Wonderful
Hello, my name's Lexie from Blue Wonderful, and I'm glad to have a chance to do a guest post on Let It Be Raw. I love making connections with other young artists, and I think Kiley has some good stuff going on with her photography. I'm a 21-year-old artist and senior at Bowling Green State University, working on getting my Bachelor of Fine Arts Degree in painting/printmaking. Today I'm going to share with you some of the things I'm currently excited about:
My newly opened Etsy Shop! I've been meaning to create a shop on Etsy for about a year now, and I finally worked up the courage to just do it.
My just-completed screenprint. This is the first screenprint I've ever done. I made the image so it can tile, since I've been really interested in textile designs and patterns lately.
My just-completed screenprint. This is the first screenprint I've ever done. I made the image so it can tile, since I've been really interested in textile designs and patterns lately.
My two new fun cameras! I recently got a Diana Mini lomography camera and a Fuji Instax mini 7x.
Fall. My favorite season. Fall has the best foods, the best holidays (Halloween anyone?), and the best weather. I love when it finally cools off, and it gets cloudy and breezy. I also love finally being able to wear jeans and sweatshirts again.
| I took this photo last year; the leaves haven't changed color yet around here. |
Attempting to learn Japanese. Right now I'm in Japanese 1010. It's pretty hard, but I've always been interested in Japan and I've always wanted to learn the language. Finally, my senior year of college, I was able to fit it into my schedule! I hope some day I'm brave enough to go to Japan.
This photo I took of Richie next to Richie. I painted a portrait of Richie, my boyfriend, two years ago for Intro to Painting class. Just the other day, we were in my room and I had my camera out and I was like "What--why did I not take this photo before?"
This photo I took of Richie next to Richie. I painted a portrait of Richie, my boyfriend, two years ago for Intro to Painting class. Just the other day, we were in my room and I had my camera out and I was like "What--why did I not take this photo before?"
Thanks for reading; be sure to stop by Blue Wonderful and say hello sometime!
Tuesday, September 20, 2011
Guest Post --- Sea Marie
Ginger Molasses Cookies
Hello lovely Let It Be Raw readers! I'm Cas and I'll be filling in today while Kiley is away on vacation. This is a recipe for Ginger Molasses cookes and let me tell you, they are amazing! They are the perfect balance of sweet and spicy without being too much and are perfect with a cup of tea or a little (or big!) scoop of vanilla ice cream.


Ingredients
1 cup Sugar
3/4 cups Crisco (vegetable Shortening)
1/4 cup Molasses
1 whole Egg
2 cups Flour
2-1/2 teaspoons Baking Soda
1 teaspoon Cinnamon
1 teaspoon Ground Ginger
1/2 teaspoon Ground Cloves
1/4 teaspoon Ground Cardamom
1/4 teaspoon Salt
Preparation Instructions
Preheat oven to 350 degrees.
Mix sugar, shortening, molasses, and egg together until well combined. Dump in dry ingredients, stirring dry ingredients together lightly. Mix together until dough is combined.
In your hands roll dough into walnut-sized balls, then generously coat each ball with sugar. Place balls on a baking sheet and bake for 9 to 11 minutes, allowing to bake for about a minute after cookies begin to crack. (source)
These cookies are perfect for fall and winter and are super easy to make. Be sure to stop by my blog and let me know if you make them (and what you think!)
Where to find me!
Blog
Etsy Soap Shop
Thank you so much Kiley for letting me share this recipe with your readers!
Hello lovely Let It Be Raw readers! I'm Cas and I'll be filling in today while Kiley is away on vacation. This is a recipe for Ginger Molasses cookes and let me tell you, they are amazing! They are the perfect balance of sweet and spicy without being too much and are perfect with a cup of tea or a little (or big!) scoop of vanilla ice cream.
Ingredients
1 cup Sugar
3/4 cups Crisco (vegetable Shortening)
1/4 cup Molasses
1 whole Egg
2 cups Flour
2-1/2 teaspoons Baking Soda
1 teaspoon Cinnamon
1 teaspoon Ground Ginger
1/2 teaspoon Ground Cloves
1/4 teaspoon Ground Cardamom
1/4 teaspoon Salt
Preparation Instructions
Preheat oven to 350 degrees.
Mix sugar, shortening, molasses, and egg together until well combined. Dump in dry ingredients, stirring dry ingredients together lightly. Mix together until dough is combined.
In your hands roll dough into walnut-sized balls, then generously coat each ball with sugar. Place balls on a baking sheet and bake for 9 to 11 minutes, allowing to bake for about a minute after cookies begin to crack. (source)
These cookies are perfect for fall and winter and are super easy to make. Be sure to stop by my blog and let me know if you make them (and what you think!)
Blog
Etsy Soap Shop
Thank you so much Kiley for letting me share this recipe with your readers!
Monday, September 19, 2011
Guest Post --- A Tiny Rocket
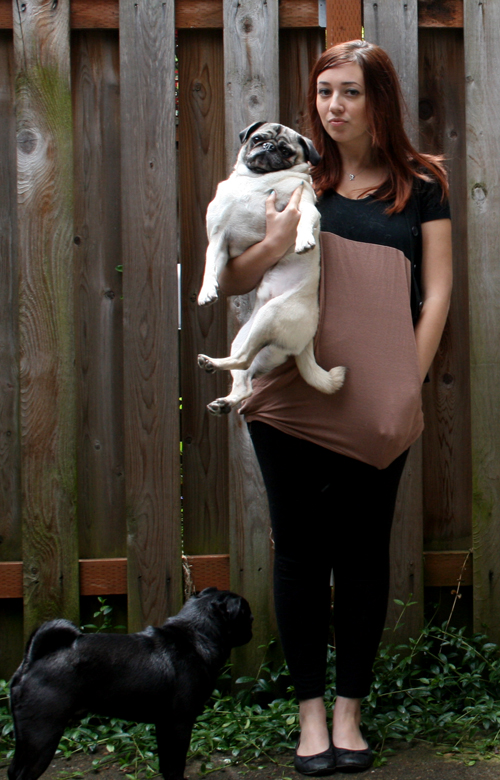
Hello! it' me Erika from A Tiny Rocket. I am an oil painting blogger and I love snapping pictures. I always keep my camera handy to captures life's little special moments and all of the moments in between. Here are a couple of tips and tricks that I learned to help take better pictures.
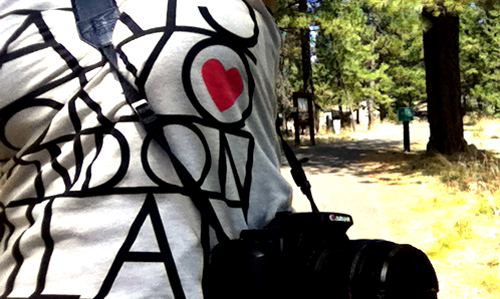
1. Take lots of pictures! The more pictures you take the more chance you have in capturing that special magic in a photo. I keep a camera on me at all times- even if it's just my smart phone camera because you will never know when you will see something that inspires you.
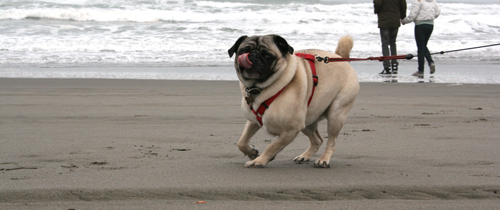
2. Don't be afraid to get up close and personal! I know especially for pet photography or taking pictures of objects- it's the best when you can get up close and see all of the little hairs on your little puppy or kitty. I know my pug monsters love getting their pictures taken and seem to get more and more diva like in front of the camera.
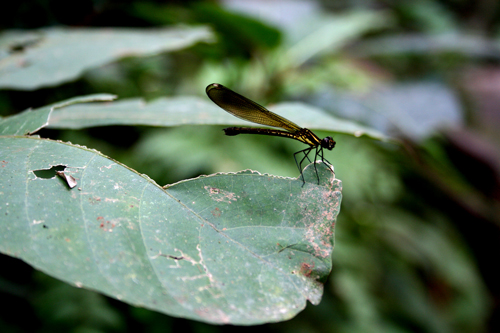
3. Have fun and don't be afraid to try something new. Don't be afraid to try and fun angle or messing around with the focus or shutter! I hate reading instructions- I am a learner by doing and experimenting. Do something unexpected. Discover all the fun things and buttons about your camera. You aren't going to know what works for you and your photography style unless you have fun and see what you think looks best through the lens.
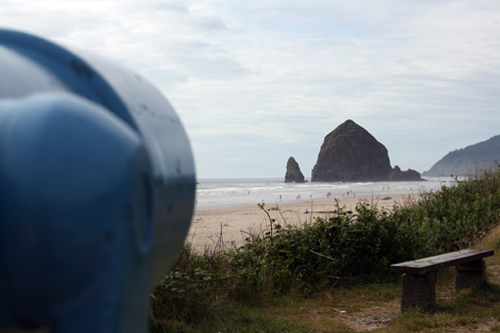
Now go get em! Take some photos!
Sunday, September 18, 2011
Next Week
Hi readers and friends,
I'm leaving for Disney World! I don't really like to talk much about personal things though they do slip in because photography can be very, very personal (or odd, because I photograph Nick so much some of you may think me obsessed. Really, he is around a lot and I carry my camera wherever I go). But, I will tell you that I am super excited to go on vacation because it has been a strange and difficult year.
I thought by now, as a graduate, I would have a secure job (rather than being laid off) and be able to start my dream job as a photographer. It is tough and times make me feel useless, so I try to stay positive and look for work and update this blog every day I can because I know that eventually, things will get better (and that there could be worse things than this). Meanwhile, I will go with my mom and my aunts and have a lovely time in Disney World. I will be back next weekend.
I hope you all have a great week,
Kiley M
Saturday, September 17, 2011
New Design for Etsy
I'm really proud of this small, geometric, graphic design collection I made for my Etsy shop. It definitely reveals more to my slight obsession of elements and nature. I may eventually add more to the collection, but for now I don't want to over do it. All the images are made from my own film photographs so they're still raw, but refashioned. Clicking any image will take you to etsy.


Many times I have photographs that I don't know what to do with and are not very interesting, so being able to reuse them in this way makes me pretty happy. Does anyone else feel this way about photographs, fabric, drawings or other art?
p.s. I'm on vacation next week and have an excellent line up of guest posts from blogs I like to read. Thanks in advance to all the bloggers who took the extra time to make a guest post for me! I really appreciate it.
p.s. I'm on vacation next week and have an excellent line up of guest posts from blogs I like to read. Thanks in advance to all the bloggers who took the extra time to make a guest post for me! I really appreciate it.
Friday, September 16, 2011
Flickr Favorites #11
This weeks Flickr inspiration is: Horses.
1.

2.

3.

4.

2.
3.
4.
I've been spending a lot more time with horses now that my partner's parents live on a ranch. 3 years ago I would never have been able to even stand next to a horse in an arena (as opposed to safely behind a fence). I was never one of those small girls who liked horses because I was too busy being terrified by how large they were. Now, they're still bigger than me but not as scary (they remind me of giant house cats). I hope to continue photographing Ingrid and Odie and perhaps add dressage to the list of things I would photograph for my future small photography business.
p.s. Click the image below and enter to win some free art.
Subscribe to:
Posts (Atom)
