


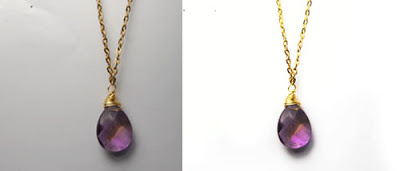
First take a photo that obviously needs some retouching. I used my nikon with a lightbox set up for this photo, but it still could use a little work.

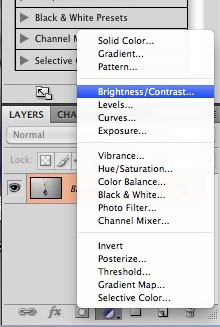
Step 1: Create a new layer fill for Brightness/Contrast.
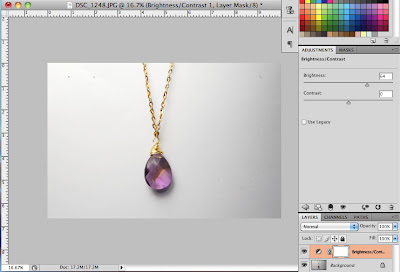
Step 2: Boost the brightness up until your photo is more vivid. Don't worry about getting it completely white yet.
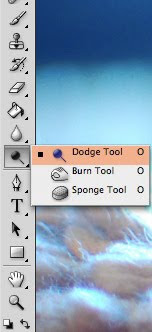
Step 3: Choose a dodge brush and select midtones.
Step 4: Start brushing the background of your photo. The gray background soon becomes a lighter white.
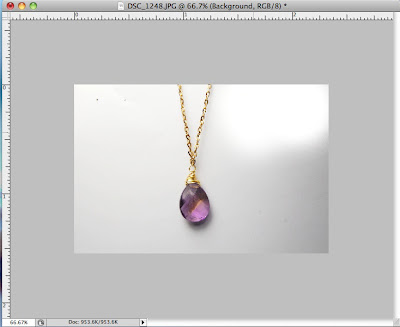
Step 5: Now select your burn brush to darken your product. For this necklace, dodge creates a deeper color.

Here is your finished product!
I hope you all enjoyed this tutorial! And I hope your product photos become beautiful and amazing!
Deer in a Bottle Blog
Deer in a Bottle Designs

Step 2: Boost the brightness up until your photo is more vivid. Don't worry about getting it completely white yet.

Step 3: Choose a dodge brush and select midtones.

Step 4: Start brushing the background of your photo. The gray background soon becomes a lighter white.

Step 5: Now select your burn brush to darken your product. For this necklace, dodge creates a deeper color.

Here is your finished product!

I hope you all enjoyed this tutorial! And I hope your product photos become beautiful and amazing!
Deer in a Bottle Blog
Deer in a Bottle Designs

2 comments:
Thank you for this! I have been paying around with Gimp lately. Also, I will check out your etsy shop. I love browsing around shops! I'd love if you checked mine out too! www.etsy.com/shop/communityphoto
cheers, and thanks again! Great post!
That's very helpful, thanks for sharing!
Post a Comment